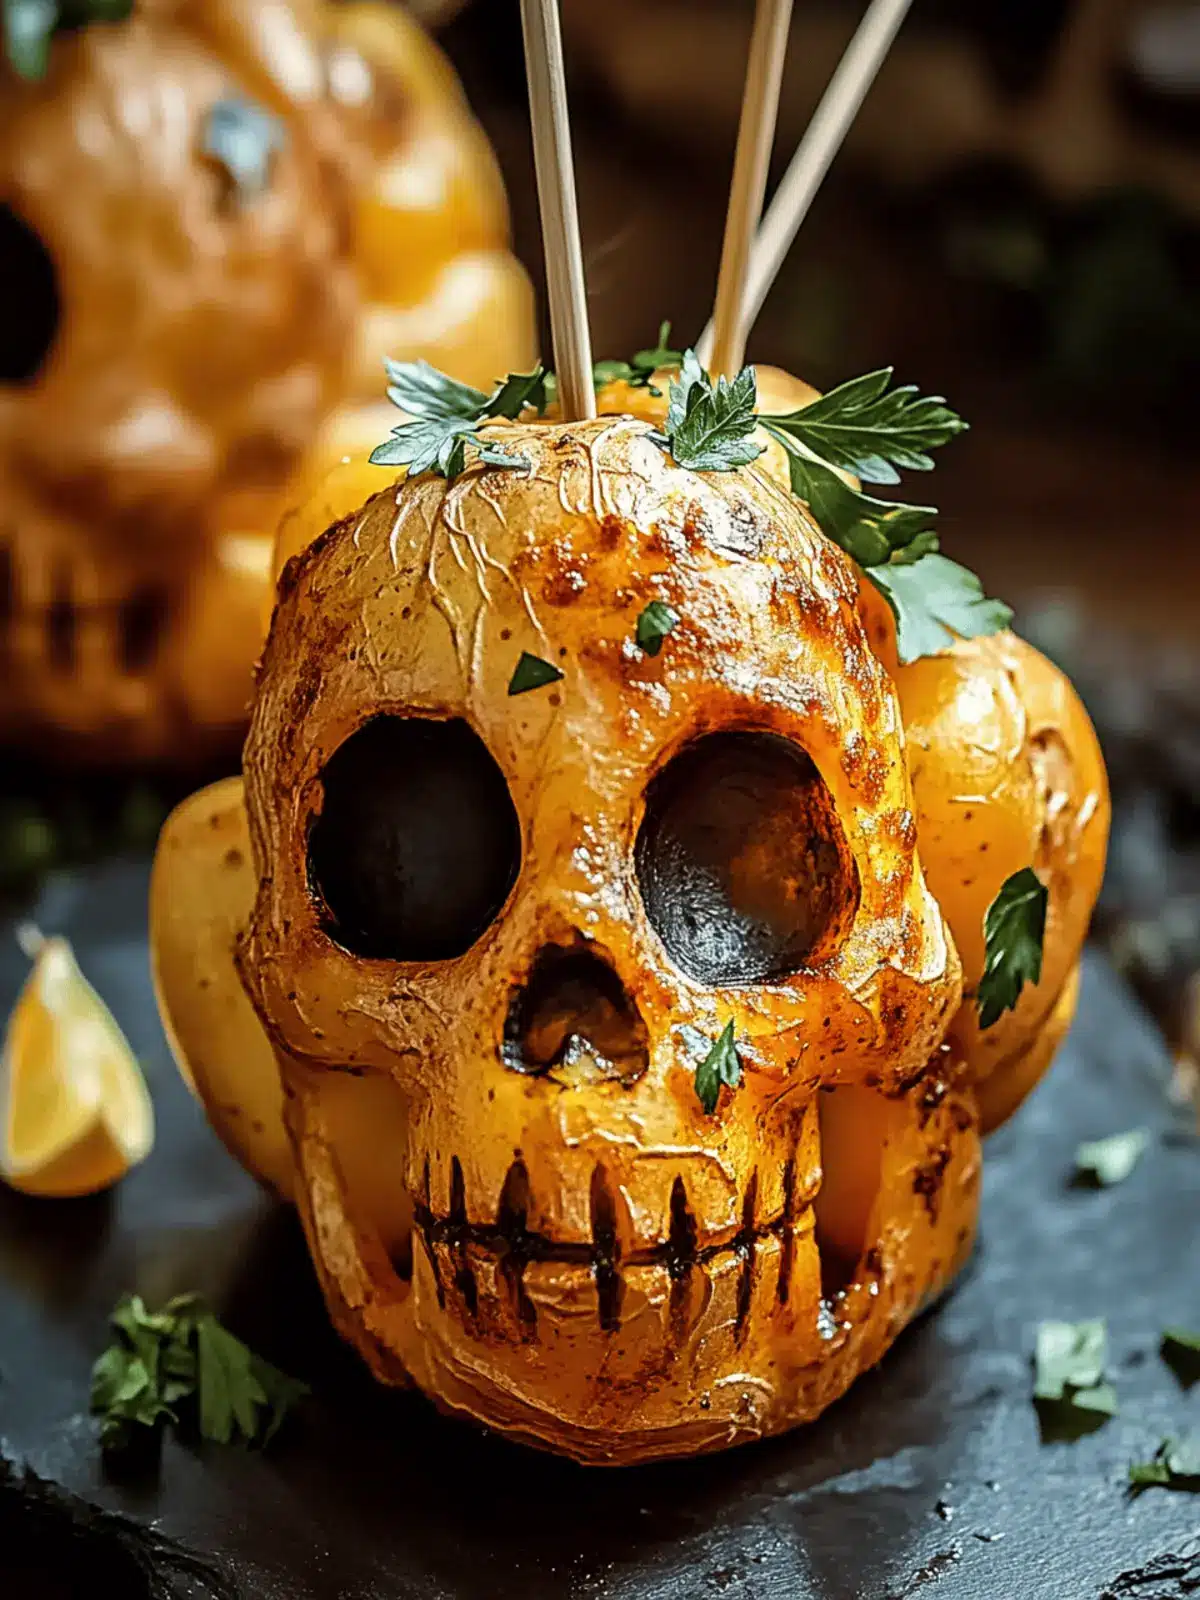
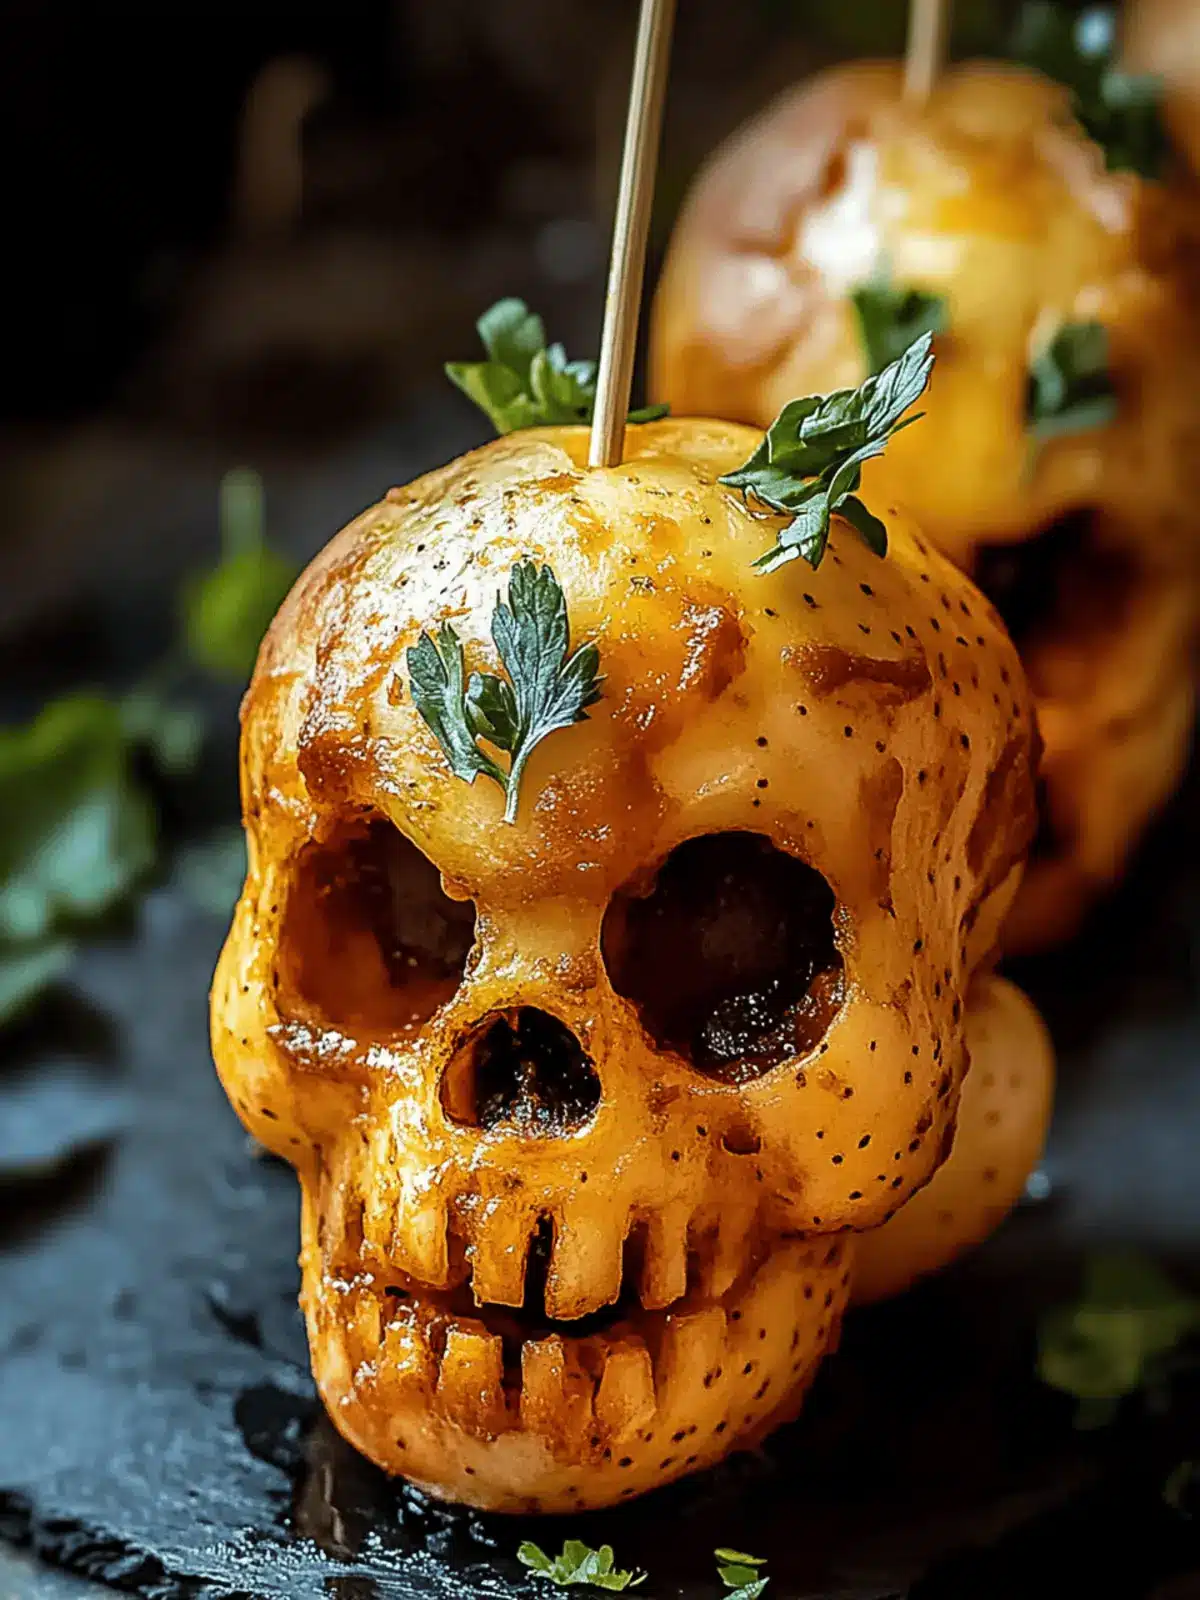
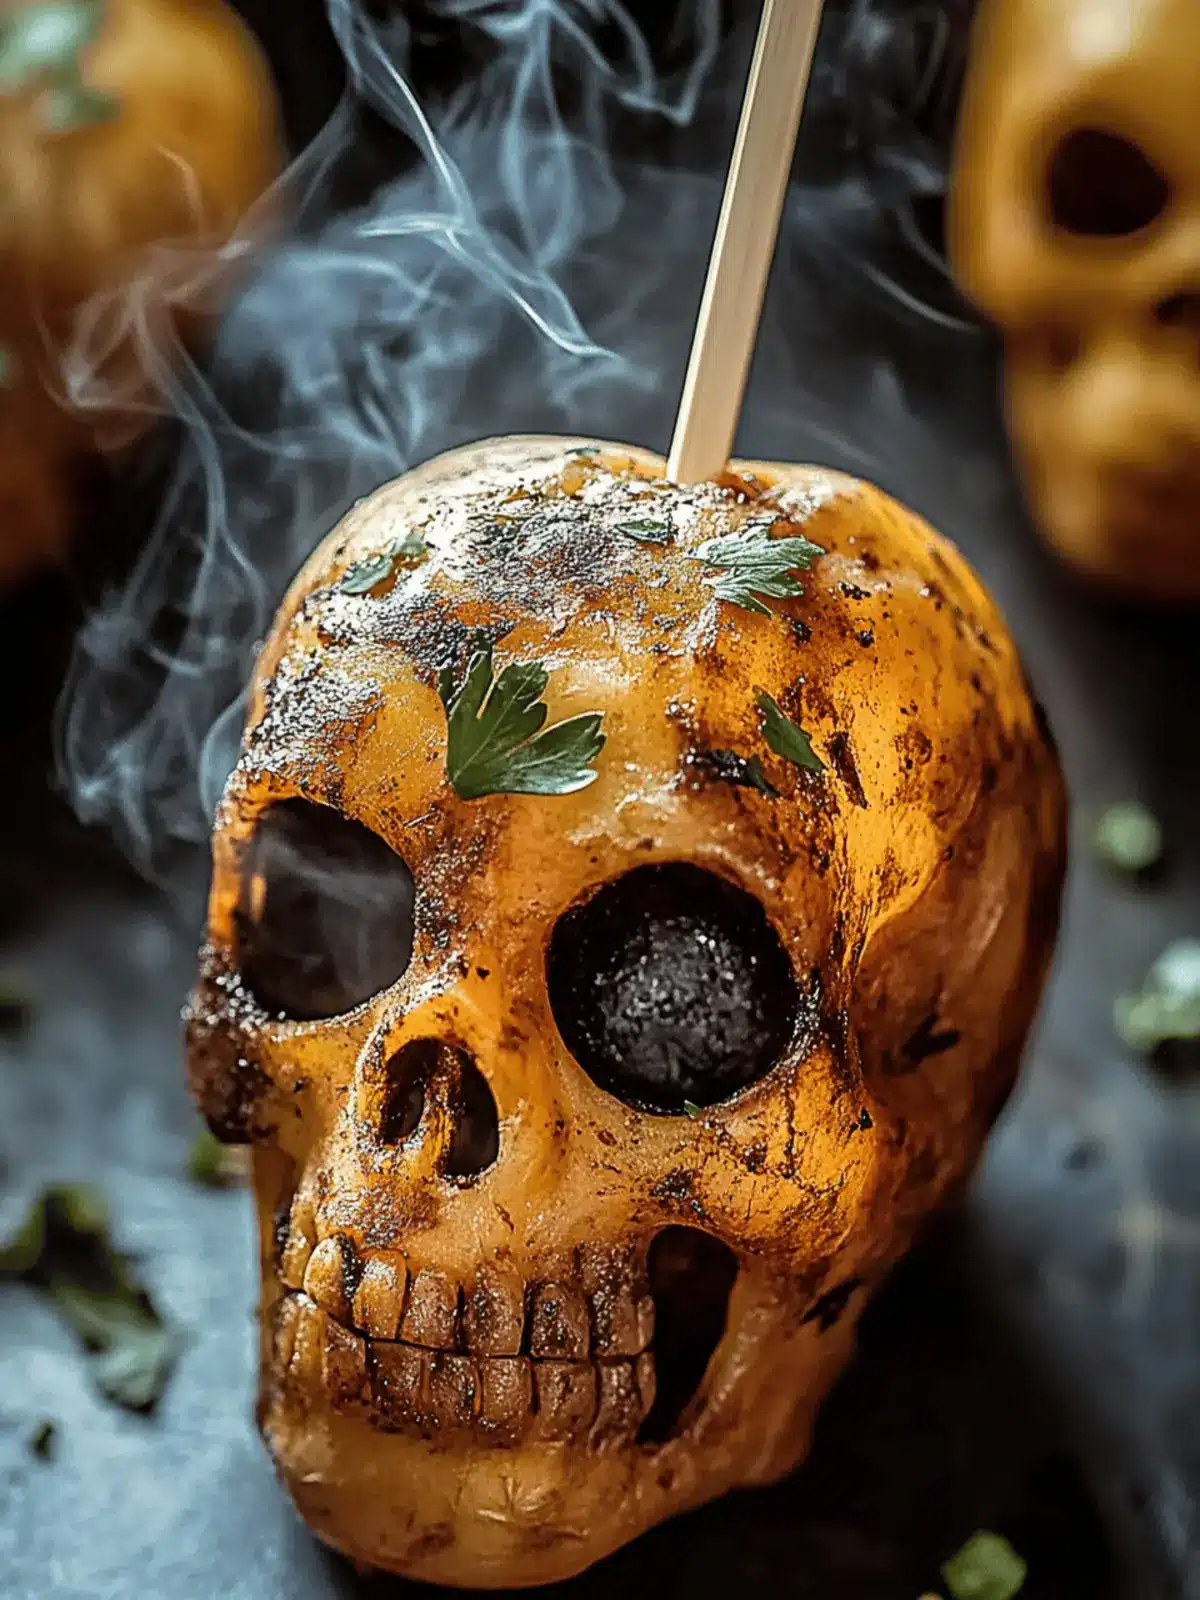
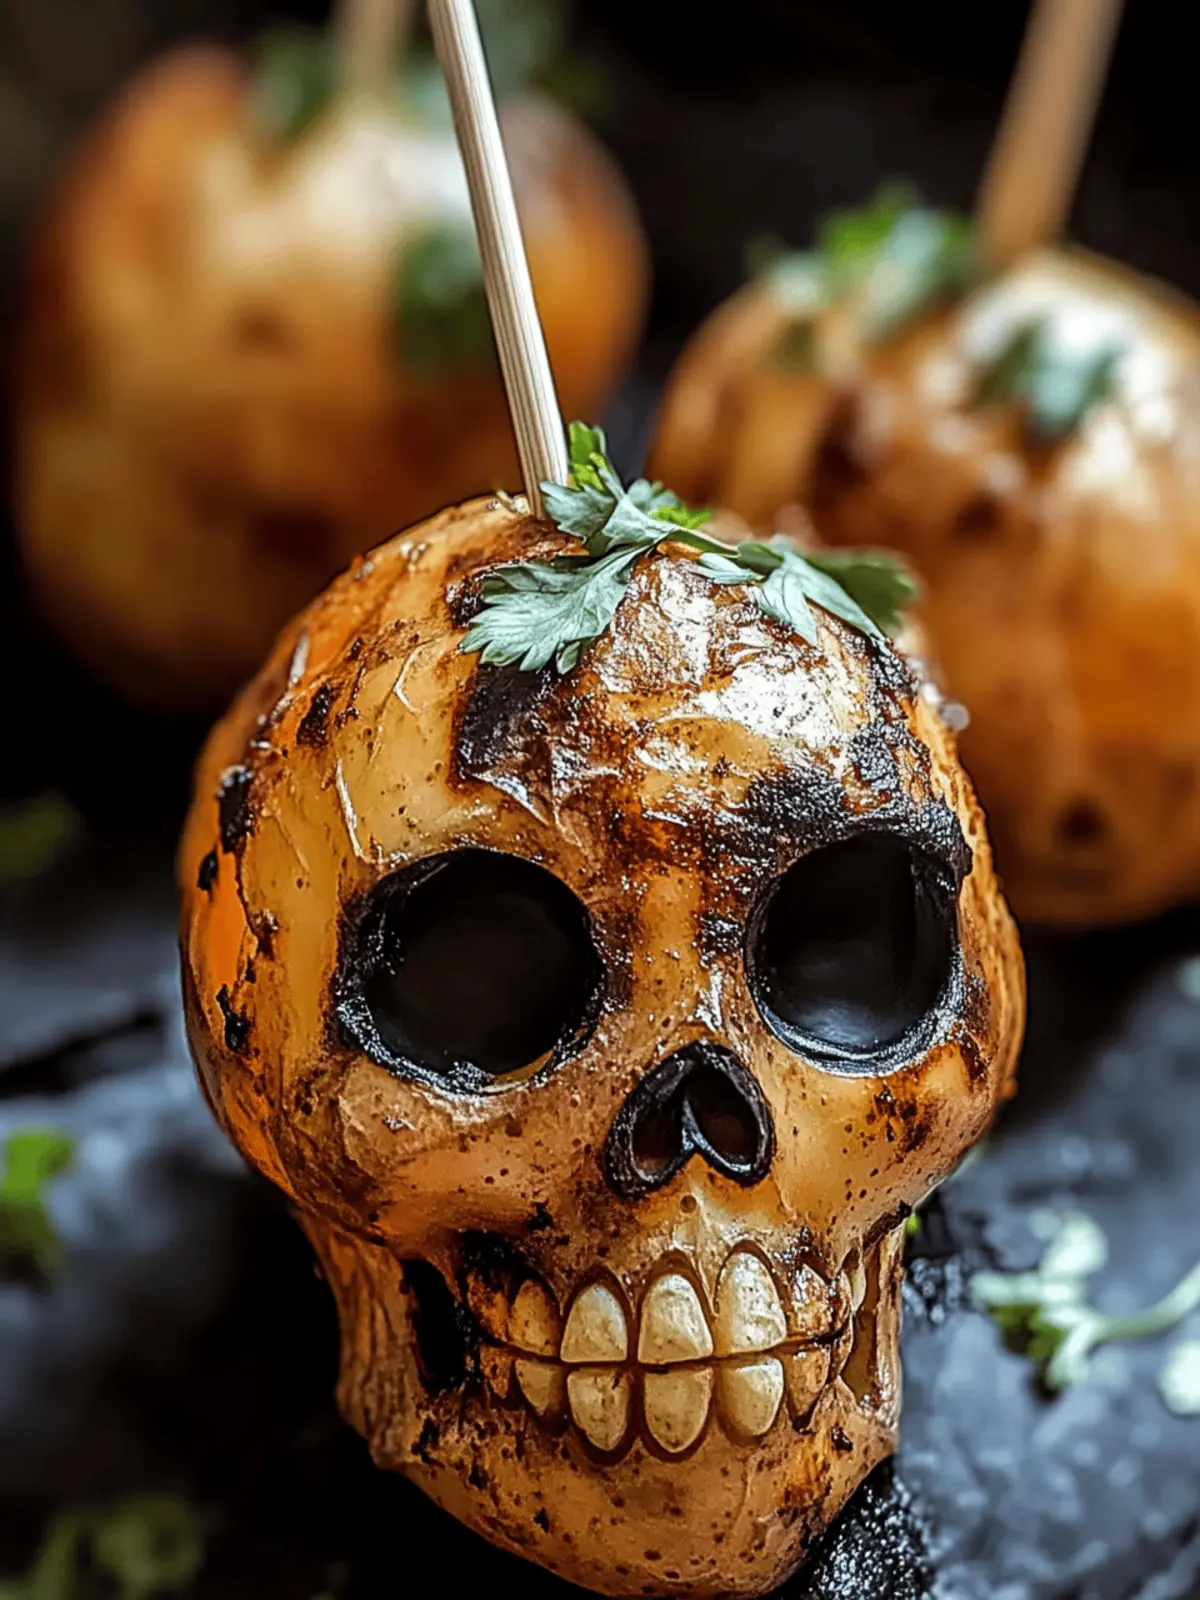
As the nights grow longer and a chill creeps into the air, there’s an undeniable excitement around Halloween—a perfect time for festive gatherings and deliciously creative food. Picture this: a cozy kitchen filled with laughter, the tantalizing aroma of mashed potatoes wafting through the air, and an unexpected twist on an old favorite emerging from the oven. My Spooky Skull Potatoes add a playful spin to traditional comfort food, transforming creamy mashed potatoes into delightful skull shapes that are sure to impress guests of all ages.
These little skulls are not just a feast for the eyes; they are rich and flavorful, making them a standout side dish for any Halloween celebration. Whether you’re planning a relaxed family dinner or an extravagant costume party, these spooky bites will undoubtedly serve as the centerpiece of your table. Join me as we dive into this whimsical and vegetarian-friendly recipe, perfect for adding a dash of fun to your autumn feasts!
Why are Spooky Skull Potatoes a Must-Try?
Playful Presentation: These imaginative skull-shaped potatoes are not just delicious but also a fun way to engage guests, bringing a festive touch to your Halloween table.
Rich, Creamy Texture: With a perfect blend of heavy cream and butter, each bite melts in your mouth, making them an irresistible comfort food.
Customizable Fun: Want to get creative? Add food coloring or mix in flavors like roasted garlic or cheese to suit your taste and celebrate the spooky season!
Easy to Make: Even novice cooks can tackle this recipe, ensuring stress-free prep for busy Halloween get-togethers.
Great for Entertaining: These eye-catching skulls become an instant conversation starter, charming both kids and adults alike at any gathering.
Spooky Skull Potatoes Ingredients
For the Potatoes
• Large Russet Potatoes – The heart of this dish, providing a fluffy texture when mashed; consider Yukon Gold for a buttery flavor.
• Heavy Cream – Adds a dreamy richness; substitute with milk or a non-dairy alternative for a lighter twist.
• Butter (melted) – Enhances flavor and creates a silky mouthfeel; use unsalted butter for better seasoning control.
• Salt and Pepper – Essential for elevating all flavors; adjust to taste for perfect seasoning in your spooky skull potatoes.
For the Decoration
• Black Olives – Perfect for creating eerie skull features like eyes and mouths; swap with cherry tomatoes for a colorful flair.
• Fresh Chives or Green Onions (optional) – Brightens the plate with a burst of color and mild flavor for garnish.
How to Make Spooky Skull Potatoes
-
Prepare Potatoes: Start by peeling and chopping the large russet potatoes into 2-inch chunks. Boil them in a pot of salted water for about 15-20 minutes, or until they are fork-tender.
-
Mash Potatoes: Drain the cooked potatoes and return them to the pot. Add the heavy cream, melted butter, salt, and pepper. Mash everything together until it reaches a smooth and creamy consistency.
-
Shape into Skulls: Use a skull mold or your hands to form the mashed potato mixture into skull shapes. Make sure to pack the mixture tightly so the skulls hold their form during baking.
-
Decorate: Gently press half black olives into the eye sockets of the skulls for a spooky touch. You can also use additional olives to craft a mouth or other facial features if you like!
-
Bake: Preheat your oven to 375°F (190°C). Place the shaped potatoes on a baking sheet and bake for 15-20 minutes, or until they are golden and crispy on the outside.
-
Serve: Once baked, garnish your spooky skull potatoes with fresh chives or green onions for a pop of color. Serve them warm and watch your guests delight!
Optional: Sprinkle with a dash of paprika for extra flavor and color.
Exact quantities are listed in the recipe card below.
Expert Tips for Spooky Skull Potatoes
• Potato Choice Matters: Opt for large russet potatoes for the best texture. Yukon Golds are buttery but may be softer, affecting the skull shapes.
• Don’t Rush the Boil: Ensure the potatoes are fork-tender before mashing. Overcooking can lead to mushy potatoes, ruining your Spooky Skull Potatoes.
• Pack Tightly: When shaping the skulls, pack the potato mixture firmly into molds or your hands to avoid them falling apart during baking.
• Season Generously: During the mashing process, taste and adjust salt and pepper to ensure your Spooky Skull Potatoes are flavorful and satisfying.
• Creative Decorations: Use various toppings like roasted garlic or colored olives to enhance the look and flavor of your spooky creations.
Spooky Skull Potatoes Variations
Embrace your creativity and customize your Spooky Skull Potatoes with these fun and flavorful twists!
-
Dairy-Free: Substitute heavy cream with coconut milk or almond milk for a lighter version that still packs a creamy punch.
-
Flavor Explosion: Mix in roasted garlic or caramelized onions to elevate the taste and add a savory depth to your skull-shaped delights.
-
Cheesy Delight: Fold in shredded cheese—like cheddar or mozzarella—before shaping for a gooey, melty surprise inside.
-
Bacon Boost: Toss in crispy, crumbled bacon for a smoky flavor that complements the creamy potatoes perfectly.
-
Fiery Twist: Add a dash of cayenne pepper or chopped jalapeños for a spicy kick that will warm up your Halloween festivities.
-
Vegetable Medley: Enhance the nutrition by mixing in finely diced spinach or broccoli for a touch of color and added greens.
-
Kid-Friendly Colors: Use vegetable-based food coloring to create vibrant, spooky hues like eerie green or glowing orange that will delight the little ones.
-
Fun Shapes: Instead of skulls, try using cookie cutters to shape the mashed potatoes into other Halloween-themed figures like ghosts or pumpkins, adding even more fun to the table!
Storage Tips for Spooky Skull Potatoes
Room Temperature: Enjoy these spooky skull potatoes right away for the best texture, but they can sit at room temperature for up to 2 hours before serving.
Fridge: Store any leftovers in an airtight container in the refrigerator for up to 3 days. Make sure they are completely cool before sealing to prevent moisture buildup.
Freezer: If you want to prepare them in advance, freeze shaped skulls on a baking sheet until solid, then transfer to a freezer bag for up to 2 months. Thaw in the fridge before baking.
Reheating: Reheat individual skulls in a preheated oven at 350°F (175°C) for about 10-15 minutes, or until warmed through and crispy, to retain their delightful texture.
What to Serve with Spooky Skull Potatoes?
Create a festive feast that will leave your guests buzzing with excitement and delight!
-
Crispy Roasted Brussels Sprouts: These earthy sprouts add a perfect crunch and complement the creamy texture of the skull potatoes beautifully.
-
Garlicky Green Beans: Bright and vibrant, green beans tossed in garlic provide a lovely contrast to the rich, smooth potatoes.
-
Pumpkin Soup: A warm, comforting bowl of pumpkin soup echoes the Halloween spirit and adds a dash of seasonal flavor to your table. Perfect as a starter!
-
Savory Stuffed Mushrooms: These little bites filled with cheese and herbs add umami depth, balancing the playful skull potatoes wonderfully. They are easy to make and serve!
-
Caesar Salad: Crisp romaine lettuce topped with creamy dressing creates a refreshing contrast against the heaviness of the potatoes, adding layers of flavor and texture.
-
Apple Cider: For a refreshing drink option, apple cider (hot or cold) brings sweet, tangy notes that pair wonderfully with the comforting flavors of the meal.
-
Pumpkin Spice Cookies: End the meal with something sweet! These cookies keep the autumnal theme alive and provide a delightful treat for dessert.
-
Spooky Themed Cocktails: A fun signature drink with creepy garnishes can elevate your gathering, bringing both taste and flair for a memorable night.
Make Ahead Options
These Spooky Skull Potatoes are perfect for meal prep and can save you time during your Halloween festivities! You can prepare the mashed potato mixture (steps 1 and 2) up to 24 hours in advance; just cover it tightly and refrigerate. The shaped skulls can be formed and stored in the fridge as well—simply wrap them in plastic wrap to keep them moist and prevent browning. When you’re ready to serve, remove from the refrigerator and bake (step 5) until they’re golden and crispy, usually taking about 15-20 minutes. This way, you can spend less time in the kitchen and more time enjoying your spooky celebration with friends and family!
Spooky Skull Potatoes Recipe FAQs
How do I choose the best potatoes for Spooky Skull Potatoes?
I recommend using large Russet potatoes for their fluffy texture when mashed. If you prefer a creamier flavor, Yukon Gold potatoes are a great alternative. Just keep in mind that Yukon Golds may be softer, which can affect the overall shape of your skulls.
How do I store leftover Spooky Skull Potatoes?
Leftovers should be stored in an airtight container in the refrigerator for up to 3 days. Ensure they have cooled completely before sealing to prevent moisture from building up and making them soggy. Reheat them in the oven for the best texture!
Can I freeze Spooky Skull Potatoes for later?
Absolutely! To freeze, shape the skulls and place them on a baking sheet lined with parchment paper. Freeze until solid, then transfer them to a freezer bag for up to 2 months. When you’re ready to enjoy them, thaw in the fridge overnight before baking them according to the original instructions.
What if my mashed potatoes are too watery?
If your mashed potatoes turn out too watery, there are a couple of tricks you can try! First, return them to the pot over low heat to evaporate some excess moisture. Stir continuously until they reach the desired consistency. Alternatively, you can mix in some instant mashed potato flakes, a tablespoon at a time, until thickened.
Are Spooky Skull Potatoes suitable for those with dietary restrictions?
Yes! These skull potatoes are vegetarian-friendly. If you have lactose intolerance or prefer a dairy-free option, substitute heavy cream with a plant-based milk and skip the butter or use a non-dairy alternative. Always check the olives and any additional toppings to ensure they fit your dietary needs.
Spooky Skull Potatoes: Fun Halloween Treats to Impress Guests
Ingredients
Equipment
Method
- Prepare Potatoes: Peel and chop the large russet potatoes into 2-inch chunks. Boil them in a pot of salted water for about 15-20 minutes, or until fork-tender.
- Mash Potatoes: Drain the cooked potatoes and return them to the pot. Add the heavy cream, melted butter, salt, and pepper. Mash until smooth.
- Shape into Skulls: Use a skull mold or hands to form the mashed potato mixture into skull shapes, packing tightly.
- Decorate: Press half black olives into the eye sockets for a spooky touch. Add more olives for mouth features if desired.
- Bake: Preheat oven to 375°F (190°C). Place shaped potatoes on a baking sheet and bake for 15-20 minutes until golden and crispy.
- Serve: Garnish with fresh chives or green onions. Serve warm.

