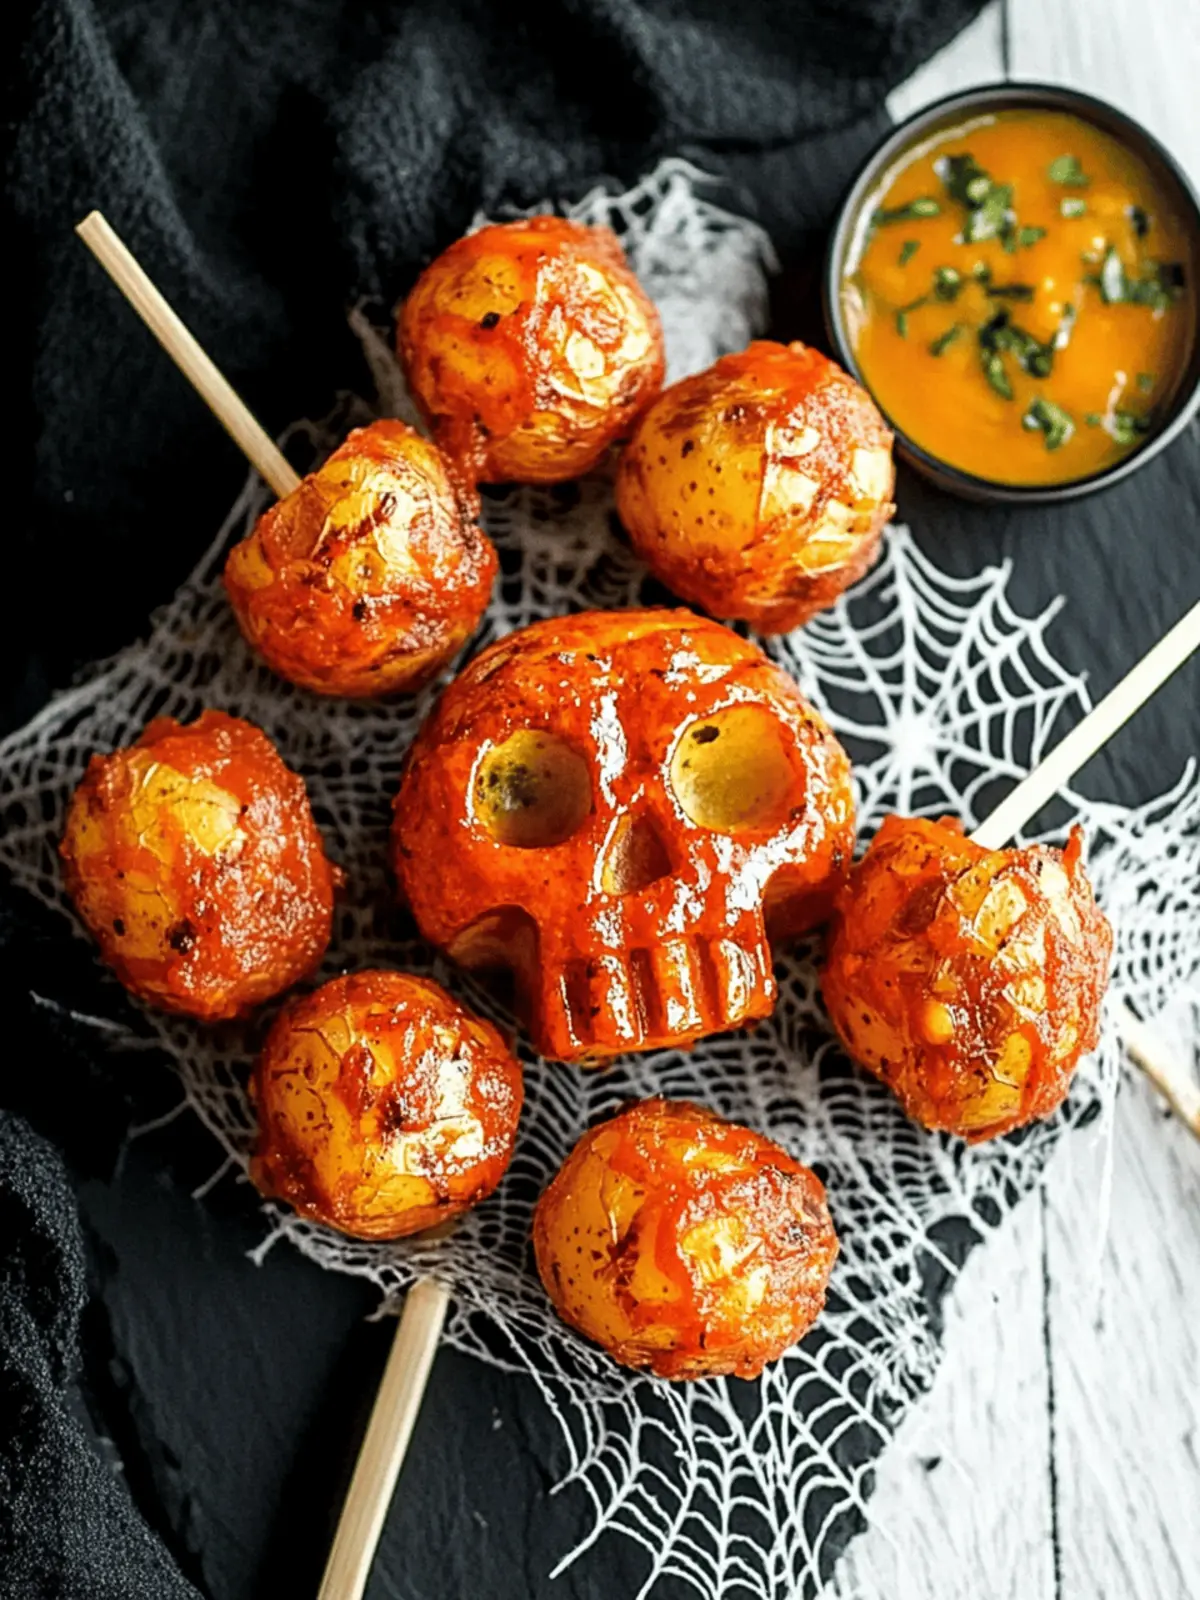
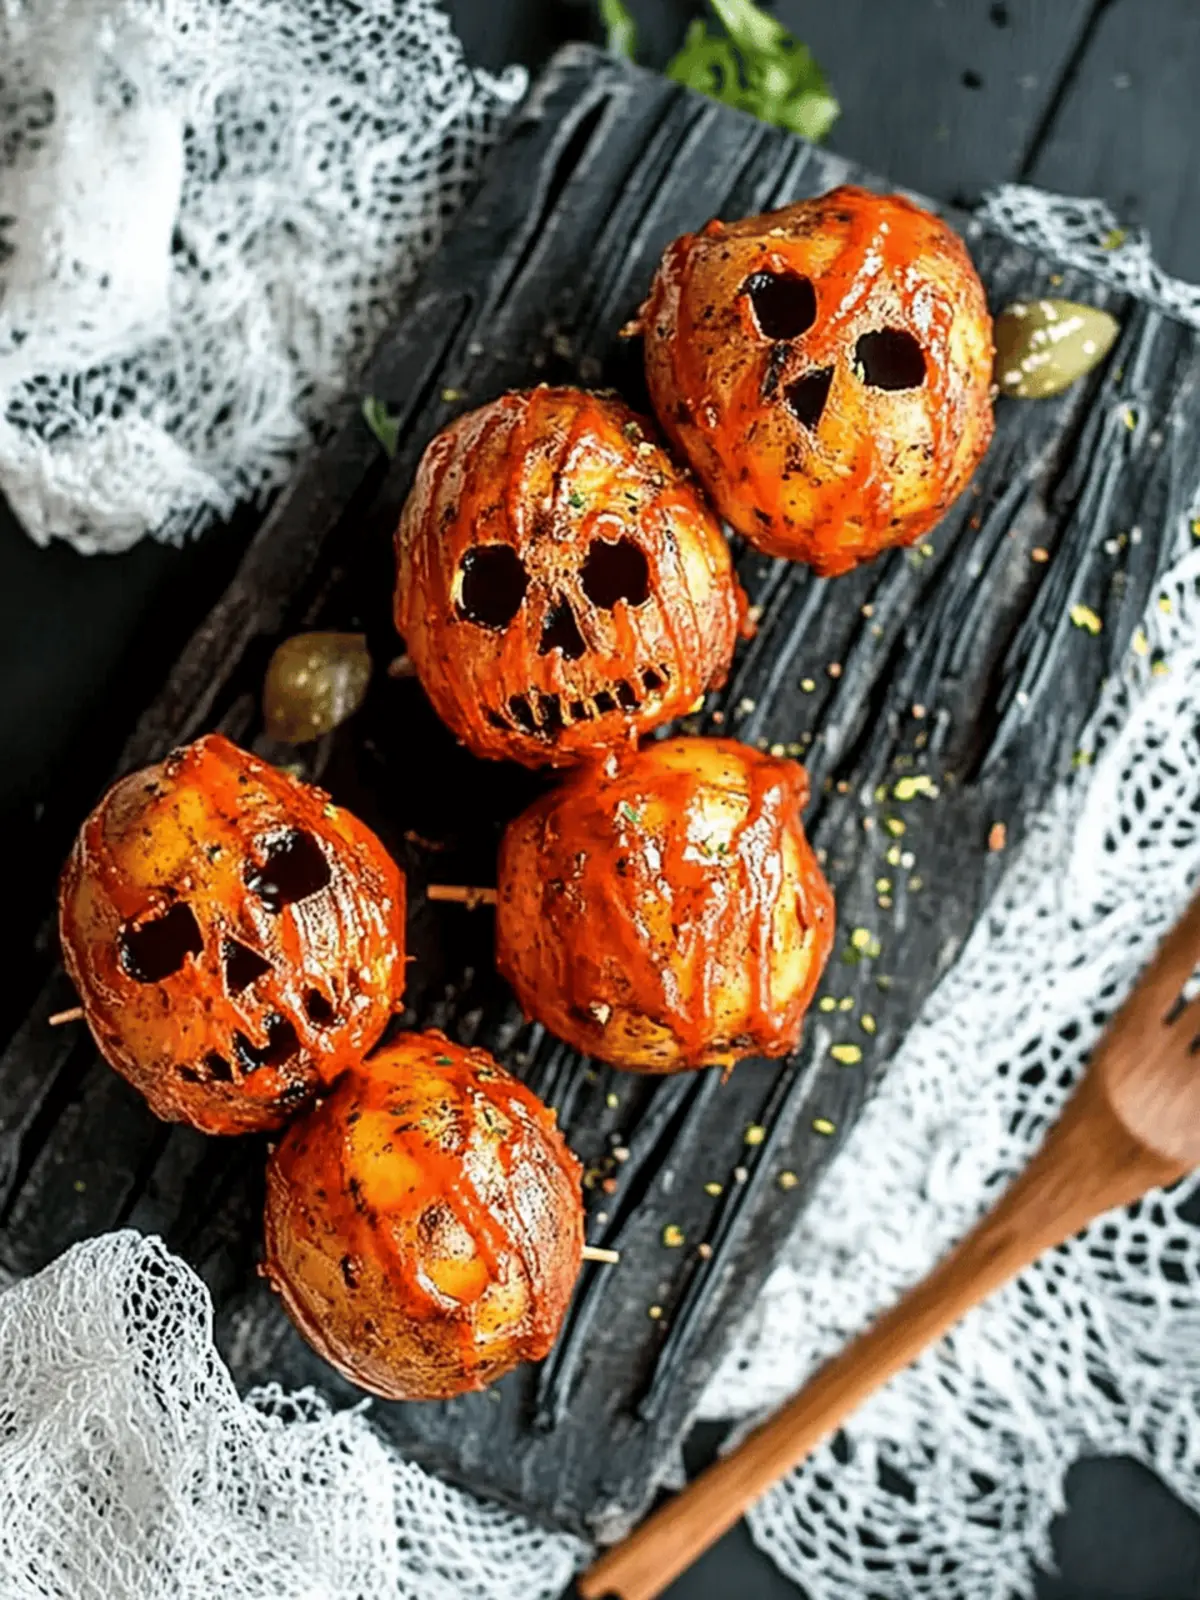
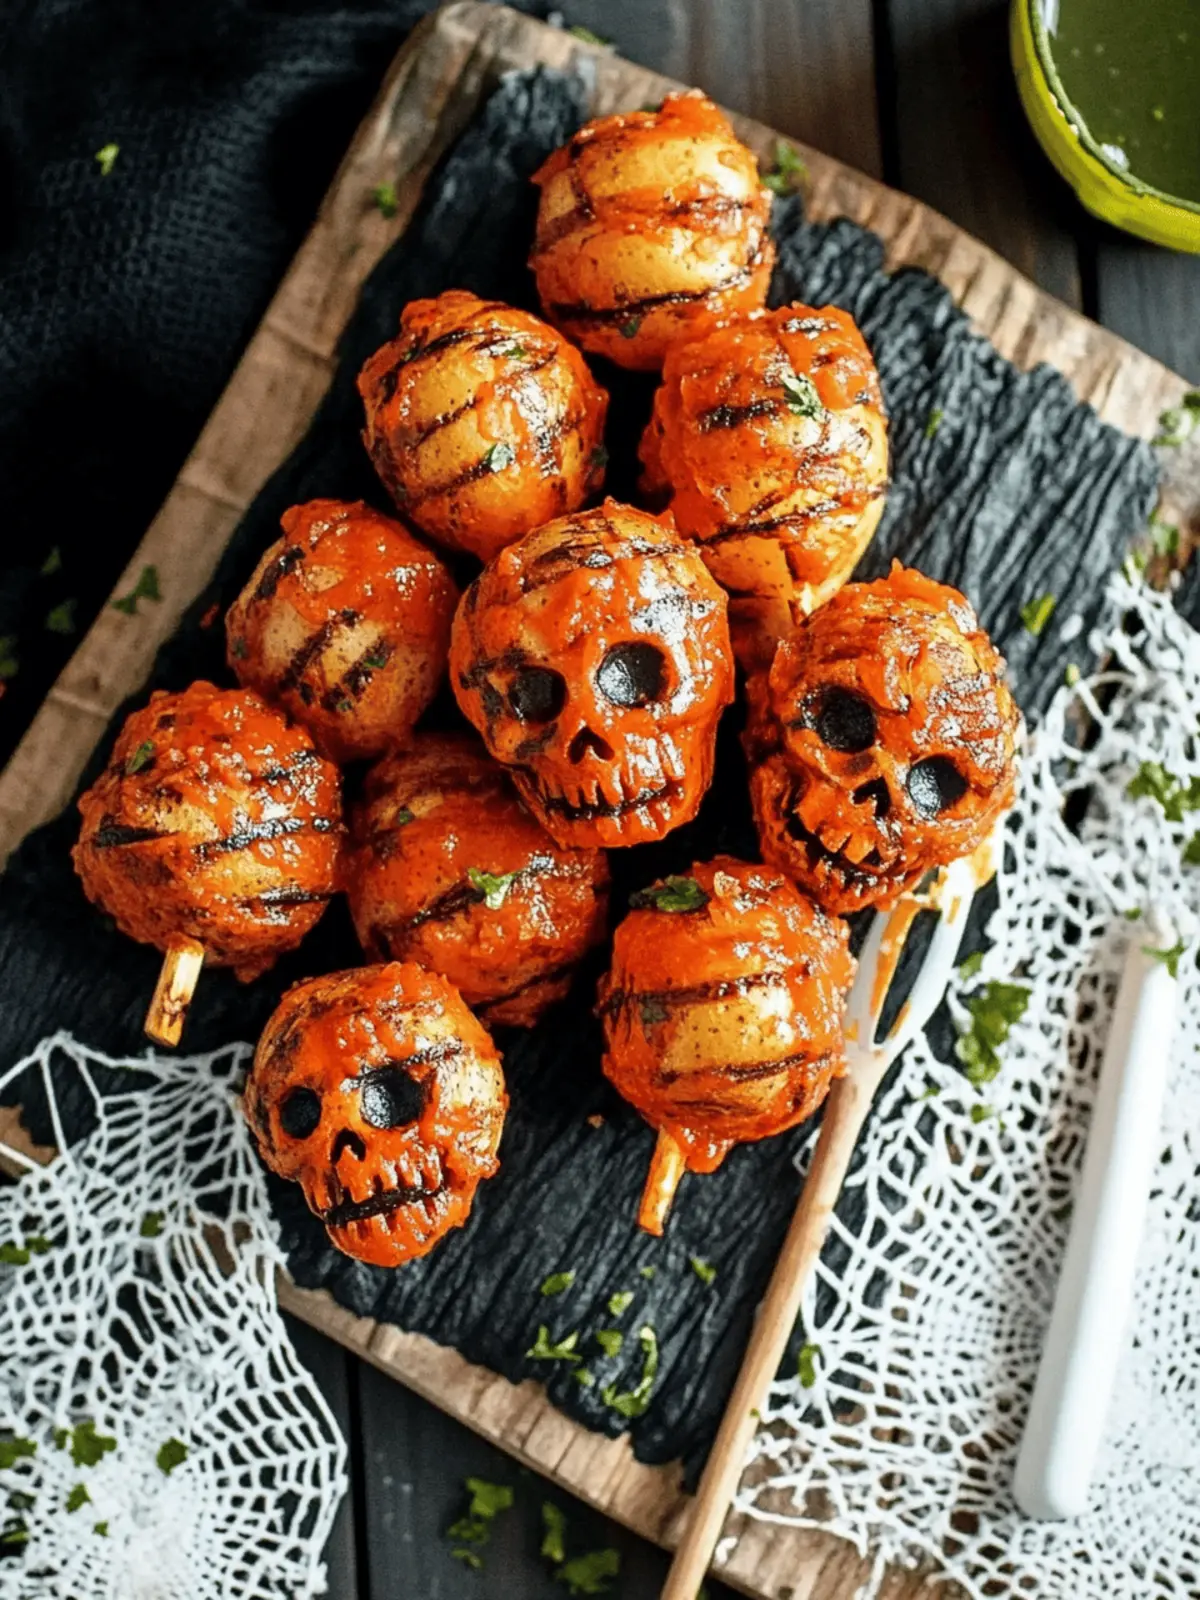
As the leaves begin to turn and the scent of winter chill drifts in, I find myself in the kitchen, ready to conjure up some festive fun. This year, I decided to elevate our Halloween gathering with a playful twist: Spooky Halloween Skull Potatoes! Inspired by the whimsical spirit of the season, these little potatoes are not only a creative delight to carve but also pack a punch of flavor that’ll keep everyone reaching for more. Roasted to a perfect golden crisp, they make for a unique appetizer that will captivate both kids and adults alike.
Picture this: your friends and family, giggling as they choose their favorite skull design while you sprinkle the bold spices that transform the simple potato into a crowd-pleaser. And the best part? These skulls are gluten-free and completely customizable, so everyone can join in on the fun. Whether you decide to add a zesty topping or keep them classic, this recipe serves as a tasty reminder that home-cooked meals can be both satisfying and spirited, making it perfect for any Halloween festivity!
Why are Spooky Halloween Skull Potatoes a hit?
Uniquely Fun: Transform ordinary potatoes into spooky skulls that are sure to spark laughter and creativity at your Halloween gathering.
Irresistible Flavor: Each bite bursts with savory seasonings, making them a flavorful treat for everyone.
Kid-Friendly: Kids will love the whimsical design and interactive carving process, engaging them in the kitchen.
Versatile Toppings: Customize with toppings like sour cream or cheese, ensuring everyone finds their favorite flavor.
Easily Prepared: With straightforward steps, these potatoes roast to a perfect golden crisp, saving you time while engaging your guests.
Wholesome and Gluten-Free: Delight in guilt-free indulgence as you whip up a festive and nutritious appetizer that satisfies all dietary needs!
Spooky Halloween Skull Potatoes Ingredients
For the Potatoes
• Mini Red Creamer Potatoes – The perfect canvas for carving; substitute with similar mini waxy potatoes if unavailable.
• Lemon Juice – Helps prevent browning and adds a zesty kick; vinegar can also be used if lemons are out of reach.
• Olive Oil – Ensures seasonings adhere while achieving a beautiful golden finish; feel free to substitute with any neutral oil.
For the Seasoning
• Onion Powder – Adds savory depth that complements the potatoes beautifully; you can swap it for garlic powder for a different flavor profile.
• Garlic Powder – Elevates each bite with its robust taste, enhancing the overall flavor of your spooky creation.
• Smoked Paprika – Infuses a smoky, earthy flavor that’s truly unforgettable; regular paprika will work in a pinch.
• Black Pepper – A touch of heat that brings the flavors together; white pepper is an excellent alternative if needed.
• Parsley Flakes (Optional) – For a pop of color and freshness; skip if you prefer a more minimalist approach.
Optional Toppings
• Dairy-Free Sour Cream – A great option for creaminess; feel free to use traditional sour cream if desired.
• Chives – They add a mild onion flavor and beautiful garnish to elevate your skull potatoes.
• Bacon Bits – Sprinkle them on for a savory crunch, making every bite extra satisfying.
• Cheese – A classic topping to enhance the flavor; choose your favorite type for the best fit.
These Spooky Halloween Skull Potatoes will surely bring joy and flavor to your Halloween festivities!
How to Make Spooky Halloween Skull Potatoes
-
Preheat the oven to 385°F (195°C) and line a baking sheet with parchment paper. This sets the stage for those deliciously crispy skull potatoes.
-
Prepare lemon water by mixing cold water with 2 tablespoons of lemon juice in a bowl. This will help keep your potatoes fresh and vibrant as you work on carving!
-
Carve spooky skull faces into each potato using a small paring knife. Submerge the carved potatoes in the lemon water to prevent browning—keep them submerged while you work!
-
Mix the seasoning by combining olive oil, the remaining tablespoon of lemon juice, onion powder, garlic powder, smoked paprika, and black pepper in a separate bowl. Stir well to create a delightful coating that elevates the flavor!
-
Drain the carved potatoes from the lemon water and toss them in the seasoning mixture until evenly coated. Make sure each potato is well-dressed for maximum taste!
-
Arrange the potatoes face side up on the prepared baking sheet. Roast for about 30 minutes or until they’re golden brown and tender—your kitchen will fill with a mouthwatering aroma!
-
Garnish optionally with your favorite toppings like dairy-free sour cream, chives, or cheese, and serve hot! Enjoy the laughs and delighted expressions as your guests dive into their spooky creations.
Optional: Add a squeeze of fresh lemon juice right before serving for an extra zesty touch!
Exact quantities are listed in the recipe card below.
Spooky Halloween Skull Potatoes Variations
Looking to add your own spin to these delightful Halloween bites? Get creative and let your imagination run wild!
-
Dairy-Free Toppings: Use dairy-free sour cream or avocado crema for a rich, creamy twist that caters to dairy-free guests.
Add a pop of color and flavor by sprinkling fresh herbs on top for a delightful finish. -
Potato Alternatives: Experiment with baby Yukon golds or purple potatoes for a fun twist on color and texture.
These variations not only taste great but also surprise your guests with a vibrant presentation. -
Spicy Kick: Add a pinch of cayenne pepper or chili powder to the seasoning mix for a delightful heat that will tantalize taste buds.
This spicy upgrade will create an exciting flavor experience that adventurous eaters will love! -
Herb Infusion: Incorporate fresh herbs like rosemary or thyme into the seasoning blend for an aromatic touch that enhances flavor depth.
Imagine the warm, inviting fragrance filling your kitchen as they roast to perfection. -
Cheesy Goodness: Top the skull potatoes with a blend of your favorite cheese before roasting to achieve a bubbly, golden crust.
The melty cheese will add an extra layer of indulgence that both kids and adults can’t resist. -
Maple Glaze: Brush the potatoes lightly with maple syrup before roasting to create a sweet, caramelized finish.
This unexpected twist adds a hint of sweetness that beautifully complements the savory flavors. -
Loaded Style: Go all out by loading them with toppings like bacon bits, scallions, and cheese for a fully loaded experience.
Each bite becomes a delightful adventure of flavors and textures, making them the star of the Halloween feast! -
Vegan Option: Use coconut oil instead of olive oil and skip cheeses to create a delightful vegan version without losing flavor.
Now everyone can enjoy these festive treats, ensuring nobody misses out on the fun!
Make Ahead Options
These Spooky Halloween Skull Potatoes are perfect for meal prep, saving you time on busy Halloween festivities! You can carve the potato skulls and soak them in lemon water for up to 24 hours in advance to prevent browning. Once carved, make the seasoning mix (combining olive oil and spices) and store it in the fridge for easy access. When you’re ready to serve, simply toss the drained carved potatoes in the seasoning just before roasting them for 30 minutes at 385°F (195°C). They’re just as delicious, allowing you to enjoy stress-free entertaining, leaving your guests wowed by your culinary creativity!
What to Serve with Spooky Halloween Skull Potatoes?
Transform your festive gathering into a culinary celebration with delightful pairings that will thrill both young and old!
-
Creamy Dips: A side of creamy sour cream or ranch dip adds cool richness that perfectly complements the crispy potatoes.
-
Mini Charcuterie Board: Fill a platter with an assortment of cured meats, cheeses, and fresh fruits. It’ll keep your guests grazing with glee!
-
Garlic Breadsticks: Crunchy on the outside and soft inside, these are ideal for dipping and enhance the dinner table’s Halloween spirit.
-
Roasted Vegetables: Add color and nutrition with a medley of seasonal veggies roasted in olive oil and spices, creating a warm contrast to the potatoes.
-
Spooky Drinks: Serve your favorite fruit punch or themed cocktails in spooky glasses for a festive touch—don’t forget some gummy worms for decoration!
-
Mini Pumpkin Desserts: Cap off the meal with miniature pumpkin pies or cheesecake bites that echo the flavors of fall while delighting the sweet tooth!
How to Store and Freeze Spooky Halloween Skull Potatoes
Fridge: Store leftover Spooky Halloween Skull Potatoes in an airtight container for up to 3 days. This keeps them fresh and ready for a quick snack or side dish.
Freezer: For longer storage, freeze the potatoes for up to 2 months. Arrange them on a baking sheet to freeze individually before transferring to a freezer-safe bag.
Reheating: To enjoy your frozen skull potatoes, simply thaw overnight in the fridge. Reheat in the oven at 350°F (175°C) for about 10-15 minutes until heated through and crisped back up.
Wrapping: If you plan to freeze or refrigerate, ensure the potatoes are completely cooled and wrapped well to prevent freezer burn and preserve their delicious flavors!
Expert Tips for Spooky Halloween Skull Potatoes
• Carving Precision: Use a small paring knife for detailed skull designs. Take your time to achieve defined features, enhancing the fun and creativity!
• Keep Them Fresh: Submerging potatoes in lemon water while carving prevents browning. It ensures your Spooky Halloween Skull Potatoes stay vibrant!
• Try Different Designs: Experiment with unique facial features or fun themes like jack-o-lanterns to make each potato a surprise for your guests!
• Safety First: When carving, supervise children closely and ensure everyone uses sharp knives safely. Creative fun should always have a cautious edge!
• Customize Toppings: Mix and match toppings to cater to everyone’s taste. From dairy-free sour cream to crispy bacon bits, let your guests enjoy their personalized potato!
Spooky Halloween Skull Potatoes Recipe FAQs
What kind of potatoes are best for carving skulls?
I recommend using mini red creamer potatoes since they provide the perfect size and texture for intricate carving. If they aren’t available, you can also use similar mini waxy potatoes like baby Yukon golds or fingerlings.
How should I store leftover Spooky Halloween Skull Potatoes?
Leftover potatoes can be stored in an airtight container in the refrigerator for up to 3 days. Make sure they are completely cooled before sealing to maintain freshness.
Can I freeze Spooky Halloween Skull Potatoes?
Absolutely! To freeze, arrange the carved potatoes on a baking sheet lined with parchment paper and freeze them individually. Once frozen solid, transfer them to a freezer-safe bag, where they can be stored for up to 2 months.
How do I reheat frozen Spooky Halloween Skull Potatoes?
To reheat, thaw the frozen potatoes overnight in the refrigerator. Preheat your oven to 350°F (175°C) and place the potatoes on a baking sheet. Heat for about 10-15 minutes, or until they are warmed through and have regained their crispy texture.
Are these Skull Potatoes safe for kids?
Yes, these Spooky Halloween Skull Potatoes are designed to be kid-friendly! However, I recommend supervising the carving process closely and assisting with sharp knives to ensure a safe and enjoyable experience for everyone.
What toppings can I use for customization?
The more the merrier! You can customize your potatoes with a variety of toppings. Some great options include dairy-free sour cream, chives, bacon bits, and cheese. Feel free to get creative and mix and match to suit everyone’s taste!
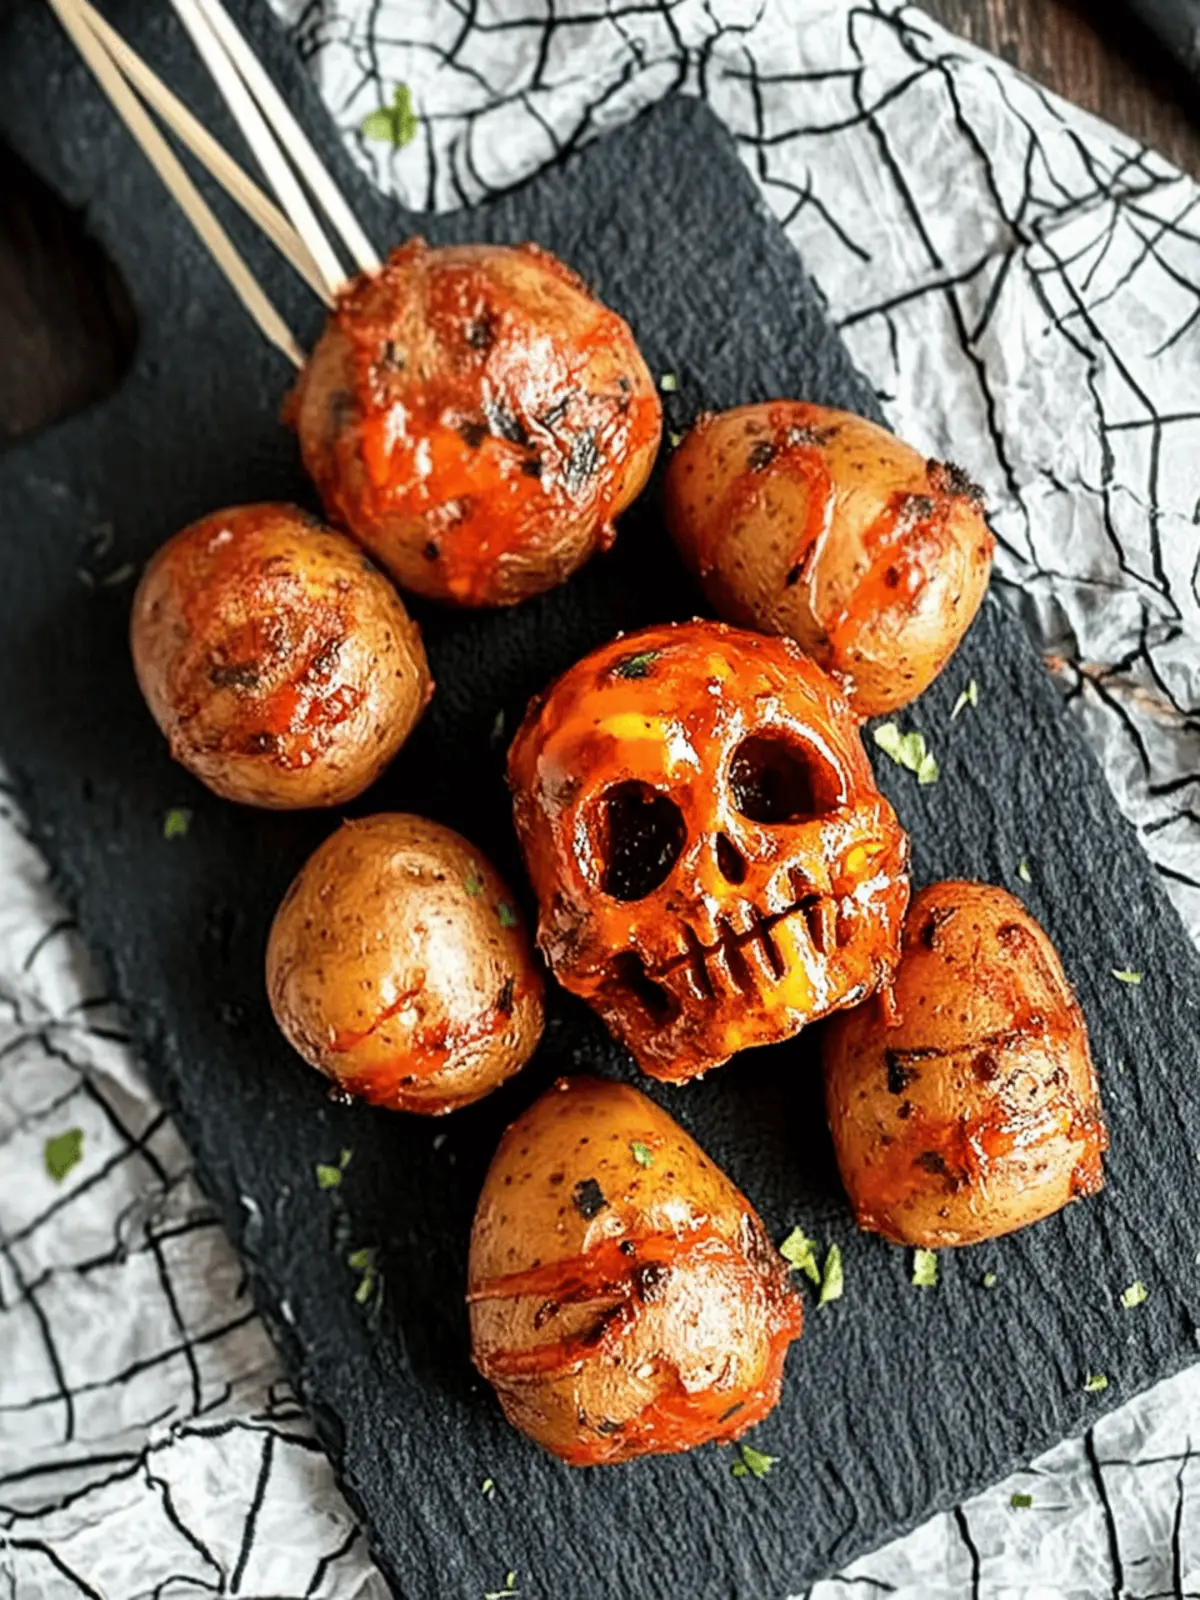
Spooky Halloween Skull Potatoes That Wow Your Guests
Ingredients
Equipment
Method
- Preheat the oven to 385°F (195°C) and line a baking sheet with parchment paper.
- Prepare lemon water by mixing cold water with 2 tablespoons of lemon juice in a bowl.
- Carve spooky skull faces into each potato using a small paring knife. Submerge them in the lemon water.
- Mix the seasoning with olive oil, the remaining tablespoon of lemon juice, onion powder, garlic powder, smoked paprika, and black pepper in a bowl.
- Drain the carved potatoes and toss them in the seasoning mixture until evenly coated.
- Arrange the potatoes face side up on the baking sheet. Roast for about 30 minutes until golden brown and tender.
- Garnish with your favorite toppings and serve hot!

