
There’s something utterly enchanting about the vibrant red hue of these Red Velvet Cheesecake Cookies that instantly brightens up any gathering. As I prepared a batch recently, the rich aroma of cocoa mingled with the creamy sweetness of the cheese filling, wrapping my kitchen in a warm embrace. Friends often ask for the story behind this delightful fusion, and I love telling them how a craving for both cookie and cake led to this ultimate treat.
After a particularly mundane week filled with takeout, I found myself yearning for a sweet adventure that I could whip up at home. These cookies are a delightful combination of rich red velvet and luscious cheesecake, making them a unique and irresistible indulgence. The best part? They’re surprisingly easy to make and always a crowd-pleaser, transforming a simple afternoon into a celebration of flavors.
Whether you’re looking for a fun baking project or a standout dessert for your next get-together, these Red Velvet Cheesecake Cookies promise to deliver both charm and taste. Get ready to impress with this decadent twist on a classic, one scrumptious bite at a time!
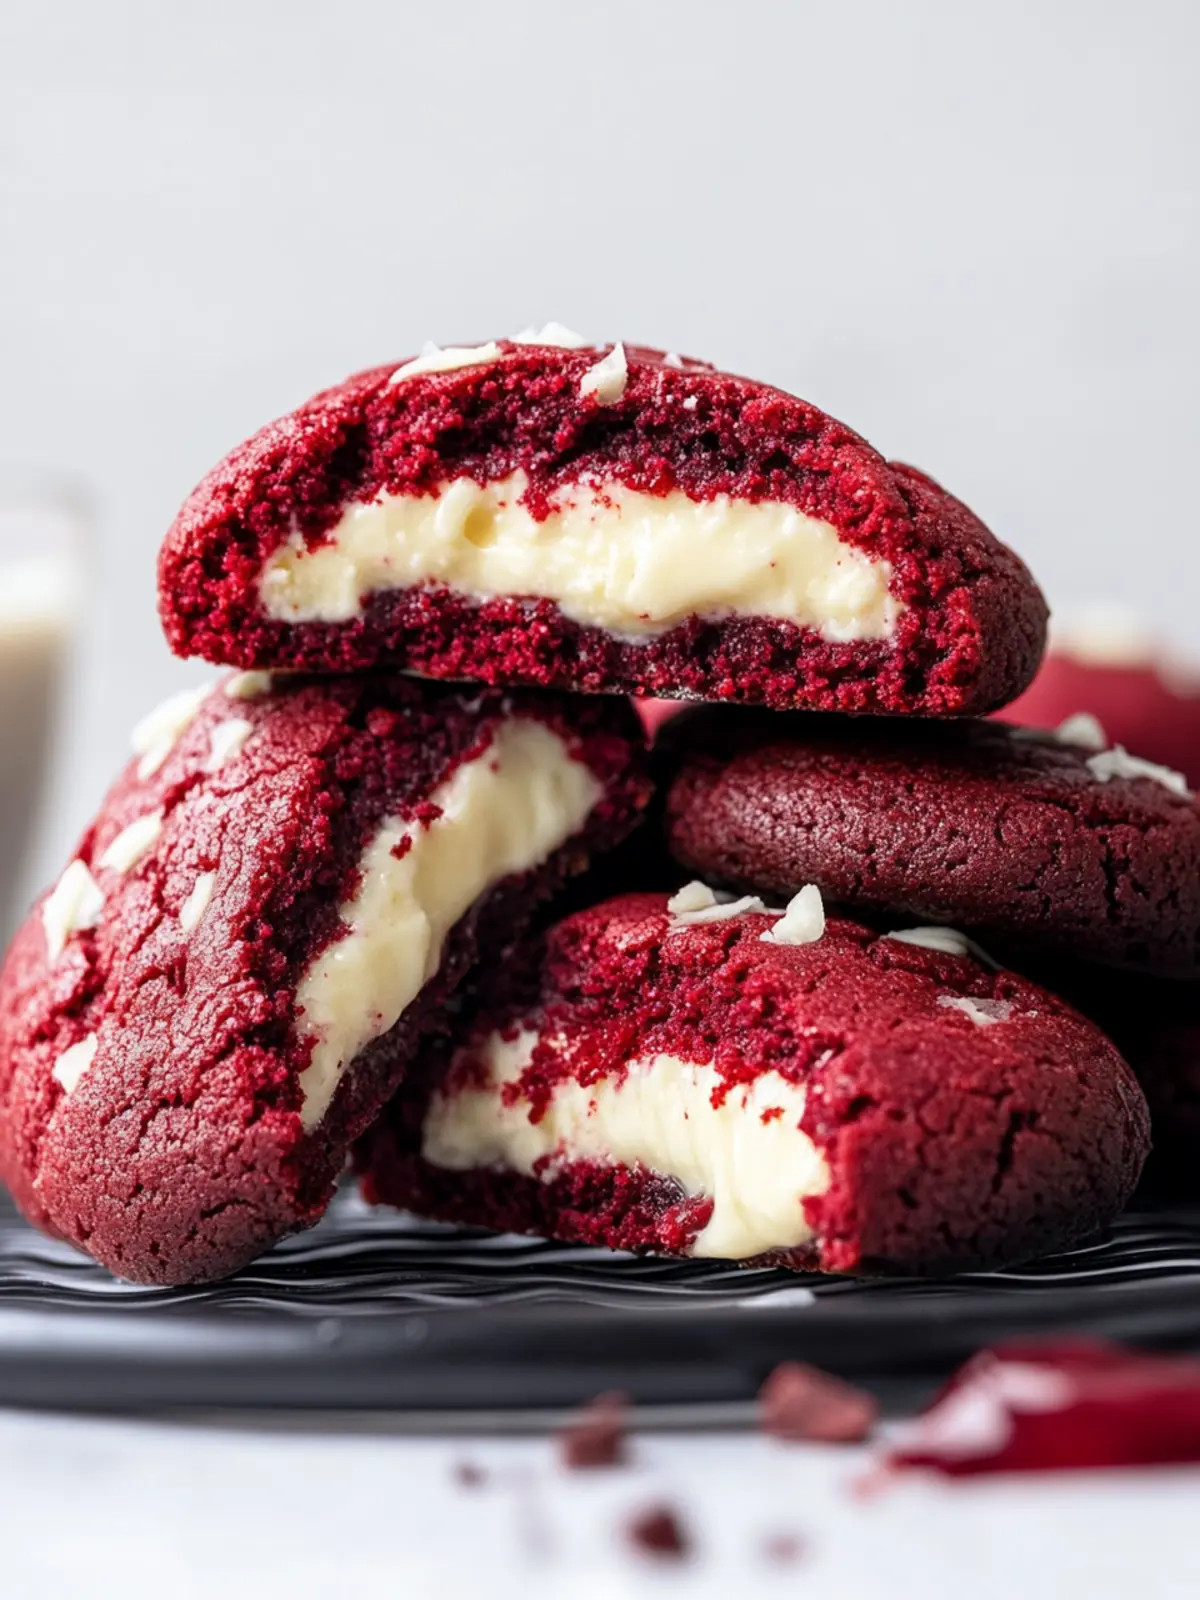
Why are Red Velvet Cheesecake Cookies a Must-Try?
Vibrant Flavor: The rich notes of cocoa combined with tangy cream cheese create an unforgettable taste experience.
Easy Process: With straightforward steps and minimal skills required, you’ll find baking these cookies to be a breeze.
Impressive Presentation: Their stunning red hue and creamy centers make them a showstopper for any occasion.
Versatile Treat: Perfect for parties or cozy family nights, they satisfy everyone’s sweet cravings.
If you’re eager to dive into other delightful desserts, don’t miss my post on delicious cookie recipes.
Time-Saving: While they do require chilling, the overall hands-on time is minimal, so you can set it and forget it.
Red Velvet Cheesecake Cookies Ingredients
• Delight in the flavors of home with these charming cookies!
For the Cream Cheese Filling
- Cream cheese – provides that creamy, tangy base for the luscious filling.
- Powdered sugar – sweetens the filling and ensures a smooth texture.
- Flour – helps to stabilize the creamy mix without making it too runny.
For the Cookie Dough
- All-purpose flour – gives structure to the cookies for that perfect chewy bite.
- Cocoa powder – infuses rich chocolate flavor and enhances the red color.
- Baking soda – ensures your cookies rise to that fluffy perfection.
- Salt – balances the sweetness, enhancing the overall flavor profile.
- Unsalted butter – adds richness and moisture; make sure it’s softened to create a smooth batter.
- Brown sugar – brings a deep, caramel-like flavor to the cookies.
- Granulated sugar – gives additional sweetness and texture to the dough.
- Large egg – binds the ingredients together for a cohesive dough.
- Vanilla extract – infuses a warm scent and flavor that complements the other ingredients.
- Distilled vinegar – adds a slight tang and reacts with the baking soda for a soft texture.
- Red food coloring – elevates the cookies’ appeal, making them visually stunning.
Optional for Rolling/Topping
- Granulated sugar – a sprinkle before baking for extra sweetness and crunch.
- Milk or whipping cream – used to create a smooth glaze, adding a lovely finish.
- Powdered sugar – the main component for a sweet drizzling glaze that ties all the flavors together.
These Red Velvet Cheesecake Cookies are sure to captivate your taste buds and impress your friends!
How to Make Red Velvet Cheesecake Cookies
-
Beat the Filling: In a medium bowl, combine the cream cheese, powdered sugar, and flour. Whisk together until smooth and creamy; this will be the luscious heart of your cookies.
-
Prepare the Filling: Line a cookie sheet or plate with wax paper. Use a cookie scoop to drop spoonfuls (about 2 teaspoons) of the filling onto the lined sheet, then freeze for at least 2 hours.
-
Whisk Dry Ingredients: In a medium bowl, whisk together the all-purpose flour, cocoa powder, baking soda, and salt. This combination adds rich flavor and helps the cookies rise beautifully.
-
Cream the Butter and Sugars: In a large bowl, beat together the softened butter, brown sugar, and granulated sugar until the mixture is creamy and fluffy. This step is essential for cookie texture!
-
Add Wet Ingredients: Mix in the egg, vanilla extract, distilled vinegar, and red food coloring into the butter mixture. Stir until everything is well combined; the vivid color will surprise you!
-
Combine Mixtures: Gently beat the dry ingredients into the wet mixture. Mix until just combined, being careful not to overwork it.
-
Chill the Dough: Cover the bowl with plastic wrap and refrigerate the dough for at least 2 hours, or up to 48 hours. Chilling helps develop fantastic flavor and texture.
-
Shape the Cookies: Scoop 1 to 1.5 tablespoons of cookie dough into your hands, flatten it slightly, and create a shallow bowl shape.
-
Fill with Cream Cheese: Retrieve a frozen cream cheese dollop from the freezer and place it on top of the cookie dough.
-
Top with More Dough: Scoop another 1 to 1.5 tablespoons of dough, flatten it, and cover the cream cheese filling. Pinch the edges to seal the filling inside, then roll into a ball.
-
Prepare for Sugar Coating: If you’re rolling in sugar, pour the extra 1/3 cup of granulated sugar onto a plate. Roll the cookie dough balls into the sugar for an extra sweet touch.
-
Freeze the Dough Balls: Place the cookie dough balls on a lined plate and cover them, then place them in the freezer for at least 30 minutes.
-
Preheat the Oven: Set your oven to 350°F (180°C) and line baking sheets with parchment paper before baking.
-
Arrange and Bake: Place the frozen cookie dough balls on the lined sheets, ensuring they are at least 2 inches apart to allow for spreading. Bake each sheet for about 12-14 minutes, or until the tops look set.
-
Cool the Cookies: Allow the cookies to cool on the baking sheet for a few minutes before transferring them to a wire rack. They should be soft yet firm.
-
Make the Glaze: For the glaze, whisk together 1 tablespoon of milk and 1 cup of powdered sugar. Add more milk or powdered sugar to achieve a smooth, drizzling consistency.
-
Drizzle and Serve: Drizzle the glaze onto the cooled cookies using a piping method if desired. Watch as this finishing touch brings them to life!
Optional: Top with sprinkles for an extra festive touch!
Exact quantities are listed in the recipe card below.

Red Velvet Cheesecake Cookies Variations
Feel free to explore these delightful twists that will enhance your baking adventure!
-
Dairy-Free: Substitute cream cheese with a dairy-free alternative, and use a plant-based butter for a similar rich texture.
These swaps maintain the luscious filling without sacrificing flavor. -
Gluten-Free: Use a gluten-free all-purpose flour blend to make these cookies suitable for gluten-sensitive friends.
Your guests won’t even miss the gluten with this tasty adaptation! -
Mint Chocolate: Add 1/2 teaspoon of peppermint extract to the dough for a refreshing twist that’ll impress peppermint lovers.
This cool flavor makes every bite feel like a festive treat! -
Spicy Kick: Incorporate a pinch of cayenne pepper or cinnamon into the dough for a surprising layer of heat and flavor.
Those who love bold tastes will adore this unexpected depth! -
Nutty Crunch: Fold in 1/2 cup of chopped nuts, like pecans or walnuts, for added texture and a satisfying crunch.
This twist adds an earthy richness that pairs wonderfully with the sweet filling. -
Chocolate Drizzle: Instead of a glaze, melt dark chocolate and drizzle it over the cookies for an indulgent finish.
This option elevates the cookie to a new level of decadence! -
Banana Cream Filling: Substitute half the cream cheese with mashed banana for a unique flavor and added moisture in the filling.
This fruity twist can add an incredible, tropical vibe to your cookies. -
Caramel Swirl: Instead of a solid cream cheese filling, mix in swirls of caramel for a gooey surprise in every bite.
This variant creates layers of flavor that melt in your mouth, leaving you craving more!
Make Ahead Options
These Red Velvet Cheesecake Cookies are fantastic for meal prep and can save you precious time! You can prepare the cream cheese filling (steps 1 and 2) up to 24 hours in advance by freezing it on a lined sheet. The cookie dough (steps 4-7) can chill in the fridge for up to 48 hours; just be sure to cover it tightly to maintain its freshness and prevent drying. When you’re ready to serve, shape the cookie dough (steps 8-10) with the prepared filling and freeze again for at least 30 minutes before baking. This ensures your cookies are just as delicious and have a perfect texture! Enjoy the convenience of having gourmet cookies ready to go in no time!
Expert Tips for Red Velvet Cheesecake Cookies
-
Chill Your Dough: Refrigerating the dough not only enhances the flavors but prevents the cookies from spreading too much while baking.
-
Cream Cheese Temp: Ensure cream cheese is at room temperature for a smooth filling; cold cream cheese can lead to lumps.
-
Don’t Skip the Freeze: Freezing the cream cheese filling before adding it to the cookies keeps it from melting out during baking. If you skip this step, you’ll lose that luscious texture!
-
Watch the Bake Time: Overbaking can dry the cookies out. They should look set but still soft in the center – they’ll firm up as they cool.
-
Food Coloring Secrets: Use gel food coloring for a vibrant hue that doesn’t dilute the dough; liquid coloring can affect consistency.
Elevate your baking game with these Red Velvet Cheesecake Cookies, and enjoy the delightful process!
What to Serve with Red Velvet Cheesecake Cookies?
Transform your sweet indulgence into a delightful experience by pairing these cookies with complementary flavors.
- Rich Vanilla Ice Cream: The creaminess of vanilla ice cream balances the richness of the cookies, making each bite heavenly.
- Fresh Berries: Strawberries or raspberries add a burst of freshness and contrast beautifully with the decadent cookies.
- Chocolate Milk: A classic pairing, chocolate milk enhances the cocoa flavor while adding a nostalgic touch to your treat.
Imagine serving these cookies with a scoop of velvety ice cream melting on top. It’s a decadent delight that will leave your guests in awe.
- Creamy Frosted Latte: The smooth coffee flavor of a frosted latte pairs perfectly, offering a delightful pick-me-up alongside the cookies.
- Whipped Cream Topping: Adding a dollop of whipped cream provides a light contrast, softening the intense flavors beautifully.
- Chocolate Drizzle: A simple drizzle of melted chocolate adds an extra layer of indulgence, transforming each cookie into a gourmet treat.
How to Store and Freeze Red Velvet Cheesecake Cookies
Room Temperature: Store cookies in an airtight container for up to 3 days to maintain their delicious softness and flavor.
Fridge: These cookies can be refrigerated for up to a week. Just ensure they are in a tightly sealed container to prevent them from drying out.
Freezer: To freeze, place the cookies in a single layer on a baking sheet until frozen solid, then transfer them to a freezer bag, where they can last up to 3 months.
Reheating: For the perfect warm treat, reheat cookies in the microwave for about 10-15 seconds or in a preheated oven at 350°F (175°C) for 5 minutes. Enjoy your irresistible Red Velvet Cheesecake Cookies!

Red Velvet Cheesecake Cookies Recipe FAQs
How do I choose the right cream cheese for the filling?
Absolutely! When selecting cream cheese for your Red Velvet Cheesecake Cookies, go for brick-style, full-fat cream cheese. This type offers a richer flavor and smoother consistency compared to spreadable cream cheese. Look out for any cracks or dryness on the surface to ensure freshness.
What’s the best way to store these cookies?
Very! Store your cookies in an airtight container at room temperature for up to 3 days. To maintain optimal flavor and moisture, separate layers with parchment paper if stacking. If you need to keep them longer, refrigerating them can extend their life up to a week. Just ensure they’re sealed tightly!
Can I freeze Red Velvet Cheesecake Cookies? How?
Of course! To freeze your Red Velvet Cheesecake Cookies, first, allow them to cool completely. Then, arrange them in a single layer on a baking sheet and freeze until solid. Once frozen, transfer the cookies to a freezer bag, removing as much air as possible to prevent freezer burn. They will stay tasty for up to 3 months.
What if my cookies spread too much while baking?
If your cookies spread excessively, it could be due to soft butter or not chilling the dough adequately. Always use softened butter, not melted, and refrigerate the dough for at least 2 hours (or even 48 for better flavors and texture). If you find they still spread, try adding a bit more flour to firm up the dough next time!
Can I make these cookies gluten-free?
Great question! Absolutely! You can substitute the all-purpose flour with a gluten-free flour blend. Just make sure it’s a blend that contains xanthan gum, which helps in binding the ingredients together. Following these small adjustments will allow everyone to enjoy these scrumptious cookies.
Are these cookies safe for pets?
Definitely not! These cookies contain ingredients such as chocolate, sugar, and butter that can be harmful to pets, especially dogs. Always keep any leftovers out of reach from your furry friends to ensure their safety.
Enjoy baking and sharing your Red Velvet Cheesecake Cookies!

Irresistible Red Velvet Cheesecake Cookies You'll Adore
Ingredients
Equipment
Method
- In a medium bowl, combine the cream cheese, powdered sugar, and flour. Whisk together until smooth and creamy; this will be the luscious heart of your cookies.
- Line a cookie sheet or plate with wax paper. Use a cookie scoop to drop spoonfuls (about 2 teaspoons) of the filling onto the lined sheet, then freeze for at least 2 hours.
- In a medium bowl, whisk together the all-purpose flour, cocoa powder, baking soda, and salt.
- In a large bowl, beat together the softened butter, brown sugar, and granulated sugar until creamy and fluffy.
- Mix in the egg, vanilla extract, distilled vinegar, and red food coloring into the butter mixture.
- Gently beat the dry ingredients into the wet mixture until just combined.
- Cover the bowl with plastic wrap and refrigerate the dough for at least 2 hours, or up to 48 hours.
- Scoop 1 to 1.5 tablespoons of cookie dough into your hands, flatten it slightly, and create a shallow bowl shape.
- Retrieve a frozen cream cheese dollop from the freezer and place it on top of the cookie dough.
- Scoop another 1 to 1.5 tablespoons of dough, flatten it, and cover the cream cheese filling. Pinch the edges to seal the filling and roll into a ball.
- Pour the extra 1/3 cup of granulated sugar onto a plate and roll the cookie dough balls into the sugar.
- Place the cookie dough balls on a lined plate and freeze for at least 30 minutes.
- Preheat your oven to 350°F (180°C) and line baking sheets with parchment paper.
- Place the frozen cookie dough balls on the lined sheets, ensuring they are at least 2 inches apart. Bake for about 12-14 minutes, or until the tops look set.
- Allow the cookies to cool on the baking sheet for a few minutes before transferring them to a wire rack.
- For the glaze, whisk together 1 tablespoon of milk and 1 cup of powdered sugar until smooth.
- Drizzle the glaze onto the cooled cookies.